
Hadoop on Windows with eclipse
Prerequisites:
Following components are required before we starting with installation.
Note:This tutorial has been written for and tested with Hadoop version 0.19.1. If you are using another version, some things may not work.
Make sure you have exactly the same versions of the software as shown above. Hadoop will not work with versions of Java earlier than 1.6 and versions of Eclipse later than 3.3.2 due to plug-in API incompatibility.
Installing Cygwin
After installing the prerequisite software, the next step is to install the Cygwin environment. Cygwin is a set of Unix packages ported to Microsoft Windows. It is needed to run the scripts supplied with Hadoop because they are all written for the Unix platform.
To install the cygwin environment follow these steps:
- Download cygwin installer from http://www.cygwin.com.
- Run the downloaded file. You will see the window shown on the screenshots below.
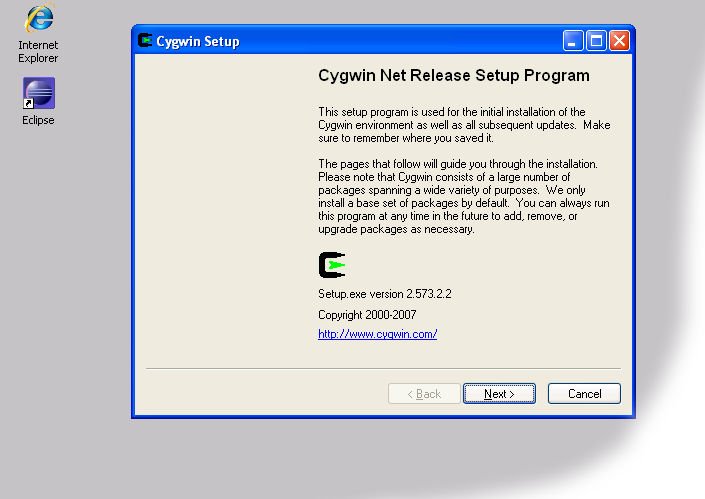
Cygwin Installer - When you see the above screenshot, keep pressing the 'Next' button until you see the package selection screen shown below. Make sure you select 'openssh'. This package is required for the correct functioning of the Hadoop cluster and Eclipse plug-in.
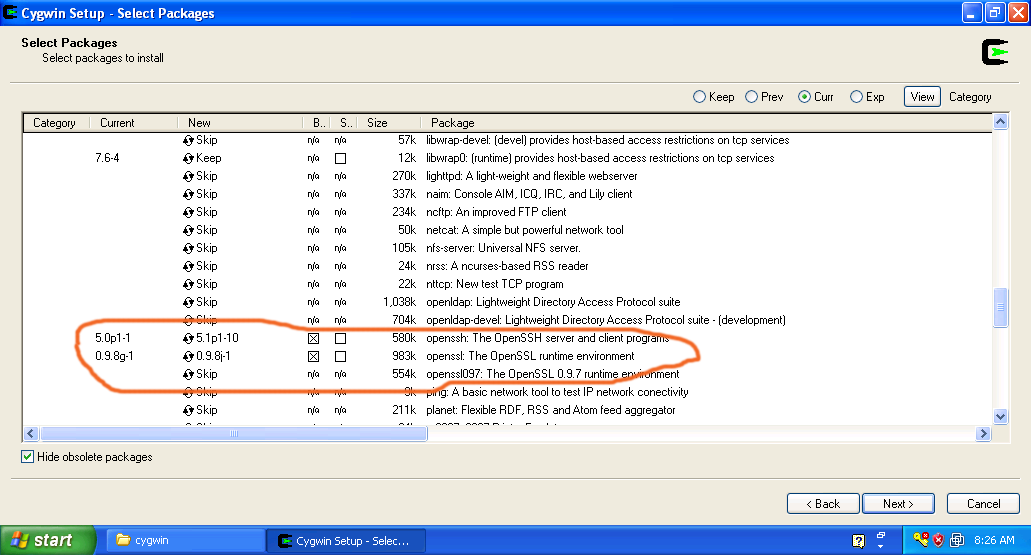
- After you selected these packages press the 'Next' button to complete the installation.
Set Environment Variables
The next step is to set up the PATH environment variable so that Eclipse IDE can access Cygwin commands
To set environment variables follow these steps:
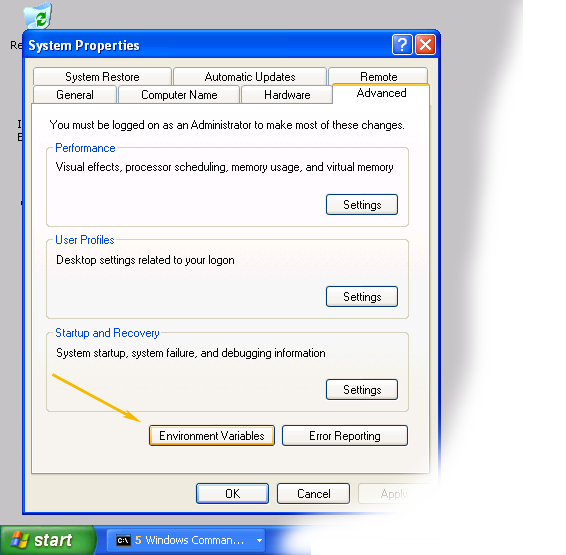
- Find "My Computer" icon either on the desktop or in the start menu, right-click on it and select Properties item from the menu.
- When you see the Properties dialog box, click on the Environment Variablesbutton as shown below
- When Environment Variables dialog shows up, click on the Path variable located in the System Variables box and then click the Edit button.
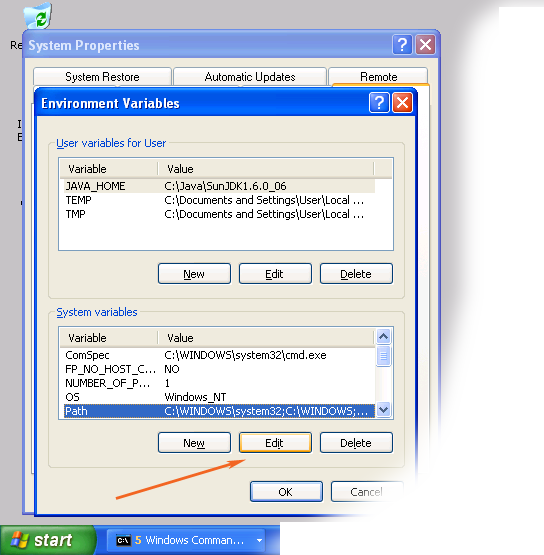
- When Edit dialog appears append the following text to the end of the Variable value field:;c:\cygwin\bin;c:\cygwin\usr\bin
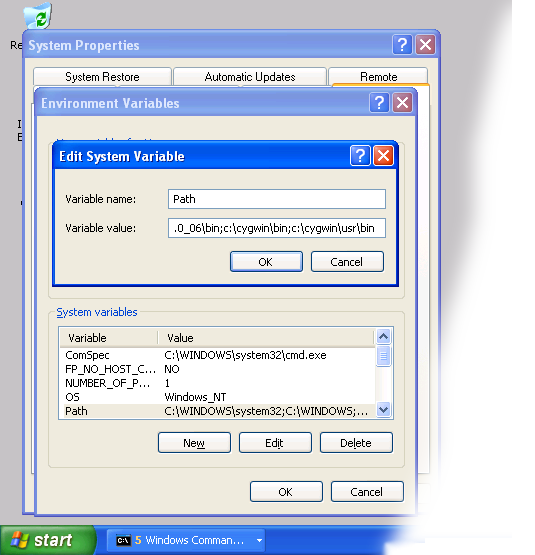 Note: If you installed cygwin in the non-standard location, correct the above value accordingly.
 - Close all three dialog boxes by pressing OK button of each dialog box.
Setup SSH daemon
Both Hadoop scripts and Eclipse plug-in need password-less SSH to operate. This section describes how to set it up in the Cygwin environment.
Configure ssh daemon
- Open the Cygwin command prompt.
- Execute the following command:ssh-host-config
- When asked if privilege separation should be used, answer no.
- When asked if sshd should be installed as a service, answer yes.
- When asked about the value of CYGWIN environment variable, enter ntsec.
- Here is an example session of this command. Note that the input typed by the user is shown in pink and output from the system is shown in gray.
 Example of using ssh-host-config
Start SSH daemon
- Find My Computer icon either on your desktop or in the start-up menu, right-click on it and select Manage from the context menu.
- Open Services and Applications in the left-hand panel then select the Servicesitem.
- Find the CYGWIN sshd item in the main section and right-click on it.
- Select Start from the context menu.

Start SSHD service
Setup authorization keys
Eclipse plug-in and Hadoop scripts require ssh authentication to be performed through authorization keys rather than passwords. The following steps describe how authorization keys are set up.
- Open cygwin command prompt
- Execute the following command to generate keysssh-keygen
- When prompted for filenames and pass phrases press ENTER to accept default values.
- After the command has finished generating keys, enter the following command to change into your .ssh directory:cd ~/.ssh
- Check if the keys were indeed generated by executing the following command:ls -l
You should see two files id_rsa.pub and id_rsa with recent creation dates.These files contain authorization keys. - To register the new authorization keys enter the following command (note the sharply-angled double brackets -- they are very important):cat id_rsa.pub >> authorized_keys

Setting up authorization keys - Now check if the keys were set up correctly by executing the following command:ssh localhostSince it is a new ssh installation, you will be warned that authenticity of the host could not be established and will be asked whether you really want to connect. Answer yes and press ENTER. You should see the Cygwin prompt again, which means that you have successfully connected.
- Now execute the command again:ssh localhostThis time you should not be prompted for anything.
Download, Copy and Unpack Hadoop
The next step is to download and copy the Hadoop distribution.
- Download hadoop 0.19.1 and place in some folder on your computer such asC:\Java.
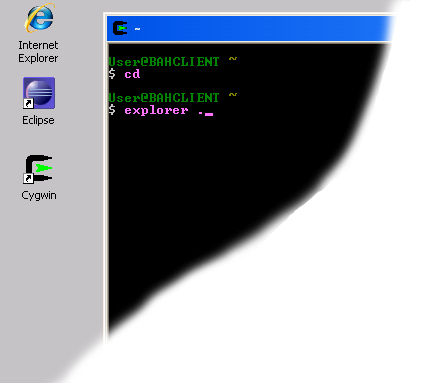
- Open Cygwin command prompt.
- Execute the following command:cd
- Execute the following command to enable your home directory folder to be shown in the Windows Explorer window:explorer .
- Open another Explorer window and navigate to the folder that contains the downloaded Hadoop archive.
- Copy the Hadoop archive into your home directory folder.
Configure Hadoop
Now that Hadoop has been unpacked, we are ready to configure it.
- Open a new Cygwin window and execute the following commands:
cd hadoop-0.19.1
cd conf
explorer .
cd conf
explorer .
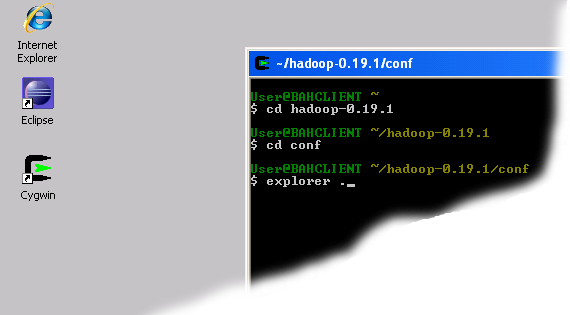
Bringing up explorer window
- The last command will cause the Explorer window for the 'conf' directory to pop up. Minimize it for now or move it to the side.
- Launch Eclipse.
- Bring up the 'conf' Explorer window opened in Step 2 and drag the filehadoop-site to the Eclipse main window.
- Insert the following lines between <configuration> and </configuration>tags.
<property>

<name>fs.default.name</name>

<value>hdfs://localhost:9100</value>

</property>

<property>

<name>mapred.job.tracker</name>

<value>localhost:9101</value>

</property>

<property>

<name>dfs.replication</name>

<value>1</value>

</property>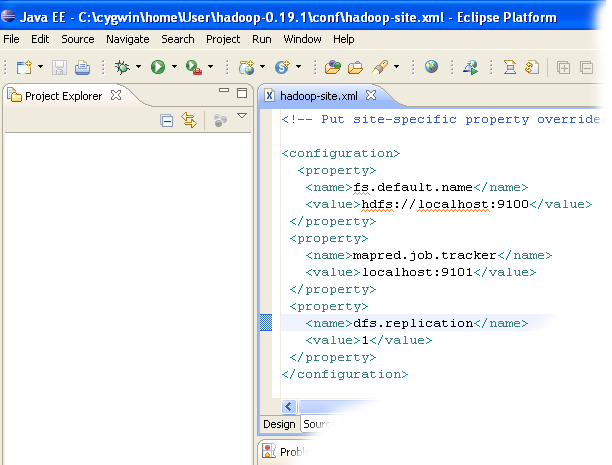
Editing site configuration file - Close the Eclipse, Cygwin command and Explorer windows.
Format the namenode
Next step is to format the Namenode to create a Hadoop Distributed File System (HDFS).
- Open a new Cygwin window.
- Execute the following commands:cd hadoop-0.19.1
mkdir logs
bin/hadoop namenode -format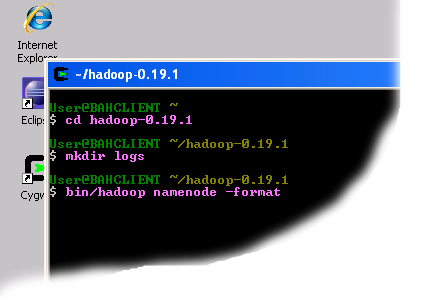
Format the namenode - The last command will run for some time and produce output similar to that shown below:
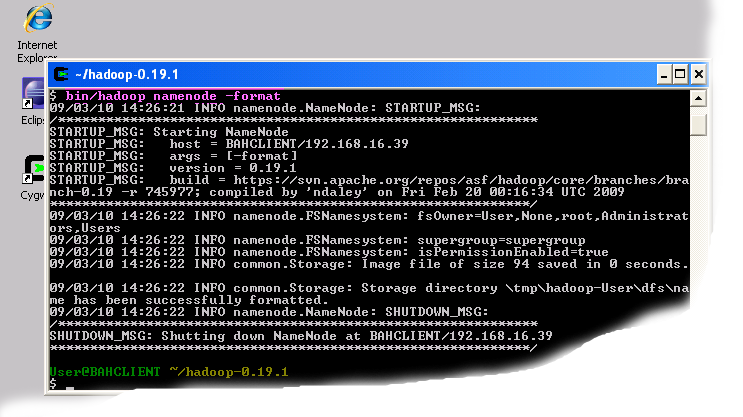
Hadoop Distributed File System created.Now that the filesystem has been created you can proceed to the next step.
Install Hadoop plug-in
The next step is to install and check the Hadoop plug-in for Eclipse.
- Open a new Cygwin window and execute the following commands:cd hadoop-0.19.1
cd contrib
cd eclipse-plugin
explorer .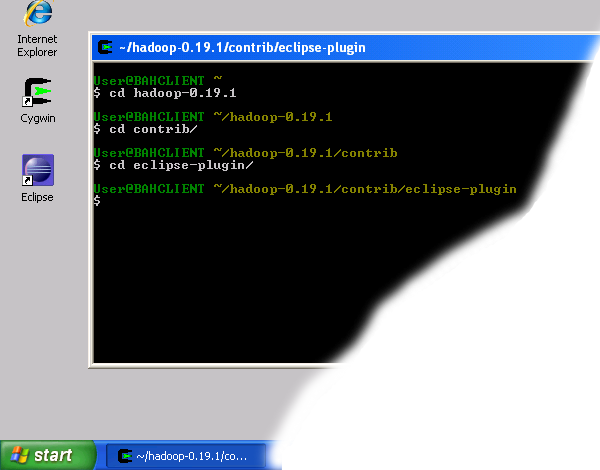 Navigate to Hadoop eclipse plugin folder
 - Shrink the newly popped window and move it to the right of the screen.
- Open another Explorer window either through "My Computer" icon or by using the "Start -> Run" menu. Navigate to the Eclipse installation and open the "plugins" folder.
- Copy the file "hadoop-0.19.1-eclipse-plugin.jar" from the Hadoop eclipse-plugin folder to the Eclipse plugins folder as shown in the figure below.
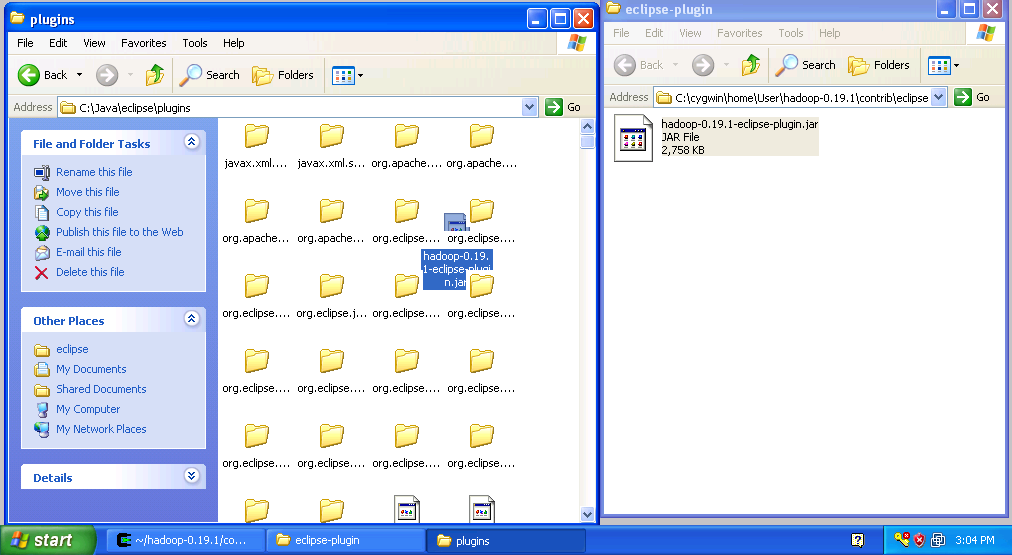
Copy Hadoop Eclipse Plugin - Close both explorer windows
- Start Eclipse
- Click on the open perspective icon
 ,which is usually located in the upper-right corner the eclipse application. Then select Other from the menu.
 - Select Map/Reduce from the list of perspectives and press "OK" button.
- As a result your IDE should open a new perspective that looks similar to the image below.
 Eclipse Map/Reduce Perspective
Now that the we installed and configured hadoop cluster and eclipse plugin i's a time to test the setup by running a simple project.
Start the local hadoop cluster
Next step is to launch the newly configured cluster.
- Close all the windows on the desktop, open five Cygwin windows and arrange them as shown below.

- Start the namenode in the first window by executing:cd hadoop-0.19.1
bin/hadoop namenode - Start the secondary namenode in the second window by executing:cd hadoop-0.19.1
bin/hadoop secondarynamenode - Start the job tracker the third window by executing:cd hadoop-0.19.1
bin/haoop jobtracker - Start the data node the fourth window by executing:cd hadoop-0.19.1
bin/haoop datanode - Start the task tracker the fifth window by executing:cd hadoop-0.19.1
bin/haoop tasktracker - Now you should have an operational hadoop cluster. If everthing went fine your screen should look like the image below:

At this point the cluster is running and you can proceed to the next step.
Setup Hadoop Location in Eclipse
Next step is to configure Hadoop location in the Eclipse environment.
- Launch the Eclipse environment.
- Open Map/Reduce perspective by clicking on the open perspective icon (
 ), select "Other" from the menu, and then select "Map/Reduce" from the list of perspectives.
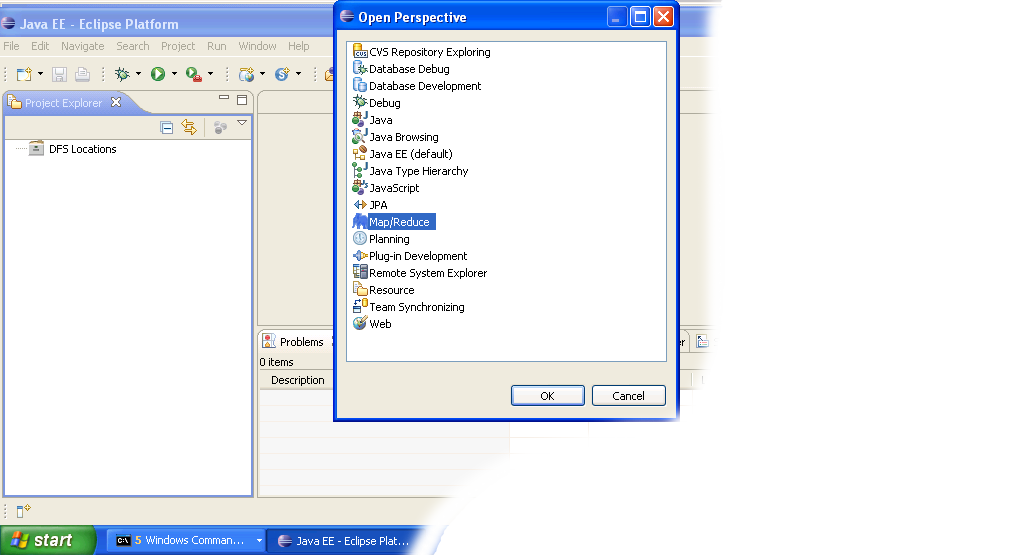
- After switching to the Map/Reduce perspective, select the Map/Reduce Locations tab located at the bottom of the Eclipse environment. Then right click on the blank space in that tab and select "New Hadoop location...." from the context menu. You should see a dialog box similar to the one shown below.
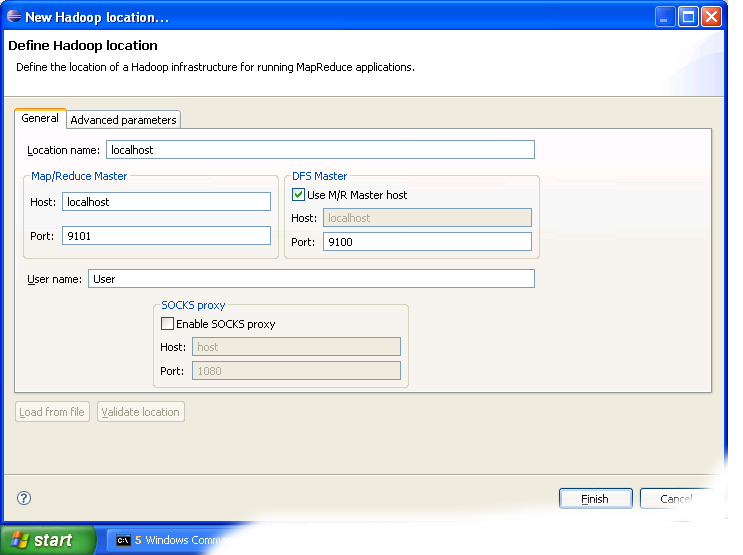
Setting up new Map/Reduce location - Fill in the following items, as shown on the figure above.
- Location Name -- localhost
- Map/Reduce Master
- Host -- localhost
- Port -- 9101
- DFS Master
- Check "Use M/R Master Host"
- Port -- 9100
- User name -- User
- After closing the Hadoop location settings dialog you should see a new location in the "Map/Reduce Locations" tab.
- In the Project Explorer tab on the left hand side of the Eclipse window, find the DFS Locations item. Open it using the "+" icon on its left. Inside, you should see the localhost location reference with the blue elephant icon. Keep opening the items below it until you see something like the image below.
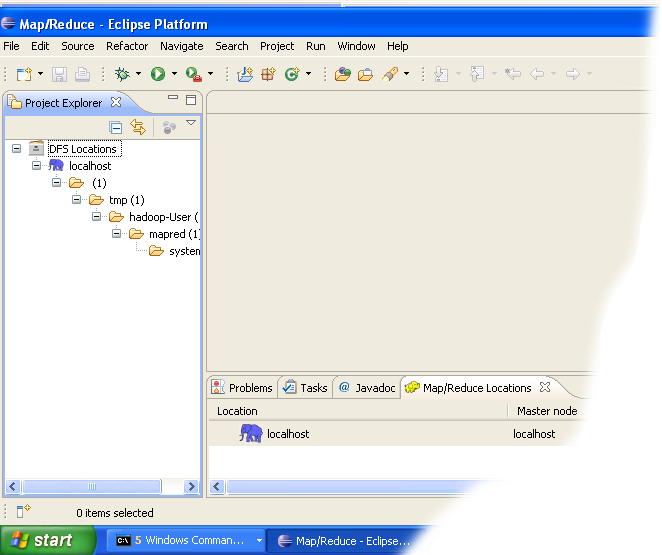
- Browsing HDFS location
You can now move on to the next step.
Create and run Hadoop project
Now we are ready to create and run out first Hadoop project.
here
Creating and configuring Hadoop eclipse project.
- Launch Eclipse.
- Right-click on the blank space in the Project Explorer window and select New -> Project.. to create a new project.
- Select Map/Reduce Project from the list of project types as shown in the image below.
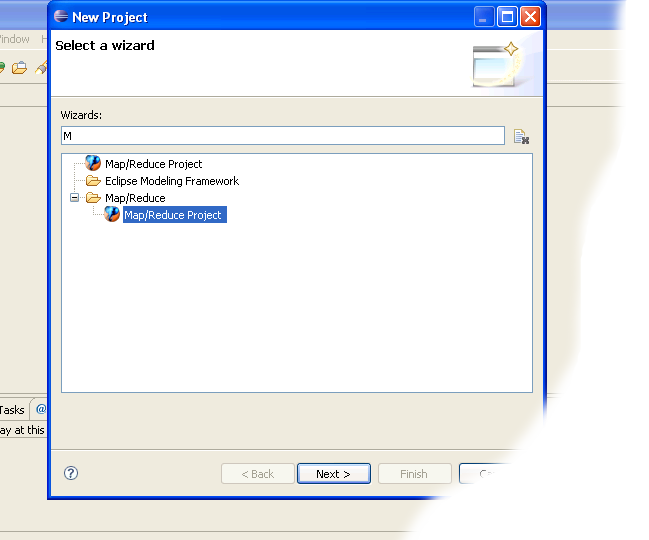
- Press the Next button.
- You will see the project properties window similar to the one shown below

- Fill in the project name and click on Configure Hadoop Installation link on the right hand side of the project configuration window. This will bring up the project Preferences window shown in the image below.
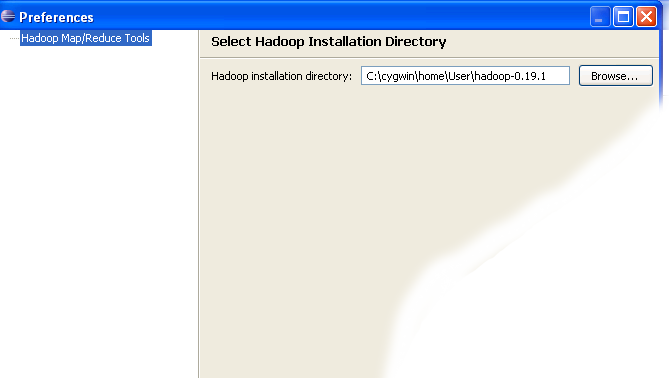
- In the project Preferences window enter the location of the Hadoop directory in the Hadoop installation directory field as shown above.If you are not sure of the location of the Hadoop home directory, refer to Step 1 of this section. Hadoop home directory is one level up from the conf directory.
- After entering the location close the Preferences window by pressing the OKbutton. Then close the Project window with the Finish button.
- You have now created your first Hadoop Eclipse project. You should see its name in the Project Explorer tab.
Creating Map/Reduce driver class
- Right-click on the newly created Hadoop project in the Project Explorer tab and select New -> Other from the context menu.
- Go to the Map/Reduce folder, select MapReduceDriver, then press the Nextbutton as shown in the image below.

- When the MapReduce Driver wizard appears, enter TestDriver in the Namefield and press the Finish button. This will create the skeleton code for theMapReduce Driver.

- Unfortunately the Hadoop plug-in for Eclipse is slightly out of step with the recent Hadoop API, so we need to edit the driver code a bit.
Find the following two lines in the source code and comment them out:conf.setInputPath(new Path("src"));Enter the following code immediatly after the two lines you just commented out (see image below):
conf.setOutputPath(new Path("out"));
conf.setInputFormat(TextInputFormat.class);
conf.setOutputFormat(TextOutputFormat.class);
FileInputFormat.setInputPaths(conf, new Path("In"));
FileOutputFormat.setOutputPath(conf, new Path("Out"));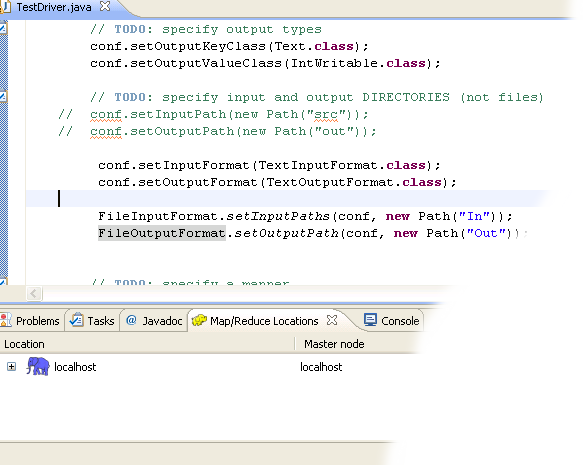
- After you have changed the code, you will see the new lines marked as incorrect by Eclipse. Click on the error icon for each line and select Eclipse's suggestion to import the missing class.
You need to import the following classes: TextInputFormat, TextOutputFormat, FileInputFormat, FileOutputFormat. - After the missing classes are imported you are ready to run the project.
Running Hadoop Project
- Right-click on the TestDriver class in the Project Explorer tab and select Run As --> Run on Hadoop. This will bring up a window like the one shown below.

- In the window shown above select "Choose existing Hadoop location" , then select localhost from the list below. After that click Finish button to start your project.
- If you see console output similar to the one shown below, Congratulations! You have started the project successfully!

I hope you like this post.


10 Comments
I have configured in your way and its working. But when I am running code , its completing map 100 but reduce 0%/. Please I am facing this issue since long time please help me
ReplyDeleteHadoop training in adyar
Hadoop training institute in adyar
The content provided here is vital in increasing one's knowledge regarding hadoop, the way you have presented here is simply awesome. Thanks for sharing this. The uniqueness I see in your content made me to comment on this. Keep sharing article like this. Thanks :)
ReplyDeleteHadoop Training Chennai | Hadoop Training in Chennai | Big data training in Chennai
There are lots of information about hadoop have spread around the web, but this is a unique one according
ReplyDeleteto me. The strategy you have updated here will make me to get to the next level in big data. Thanks for
sharing this.
Visit SKARTEC
SKARTEC Digital Marketing Academy
digital marketing course fees
digital marketing course online
digital marketing course near me
digital marketing course in chennai fees
digital marketing course in tamil
digital marketing course with placement
digital marketing training institute in chennai
digital marketing training institute
digital marketing training institute near me
digital marketing training in india
digital marketing training in chennai
pendik mitsubishi klima servisi
ReplyDeleteçekmeköy mitsubishi klima servisi
ataşehir mitsubishi klima servisi
maltepe vestel klima servisi
kadıköy vestel klima servisi
maltepe bosch klima servisi
beykoz vestel klima servisi
üsküdar vestel klima servisi
beykoz bosch klima servisi
Success Write content success. Thanks.
ReplyDeletedeneme bonusu
kralbet
canlı poker siteleri
betpark
betturkey
betmatik
kıbrıs bahis siteleri
Good content. You write beautiful things.
ReplyDeletemrbahis
vbet
mrbahis
sportsbet
korsan taksi
vbet
taksi
hacklink
sportsbet
slot siteleri
ReplyDeletekralbet
betpark
tipobet
mobil ödeme bahis
betmatik
kibris bahis siteleri
poker siteleri
bonus veren siteler
OJQİ
kars
ReplyDeletekütahya
niğde
urfa
aydın
VSİX0N
شركة مكافحة حشرات بمكة
ReplyDeletem1RZxTaldc
شركة تنظيف مكيفات بجدة
ReplyDeleteVfiq10m2uhWYz